Using Anjuta
Creating a project with Anjuta need just a few clicks but then we will take a look at the created files.
- 3.2.1. Create a new project
- 3.2.2. Looking at configure.ac
- 3.2.3. Looking at Makefile.am
3.2.1. Create a new project
-
Click on . The new project assistant appears.
-
Click on . The project selection page appears:
Figure 3-2 Project selection page
-
Select Generic (minimal) project in the C page.
-
Click on .
Figure 3-3 Project basic information page
Change Project Name to tutprog, the project name should contains only alpha numeric characters or underscore. Fill the remaining field.
-
Click on Forward.
Figure 3-4 Project options page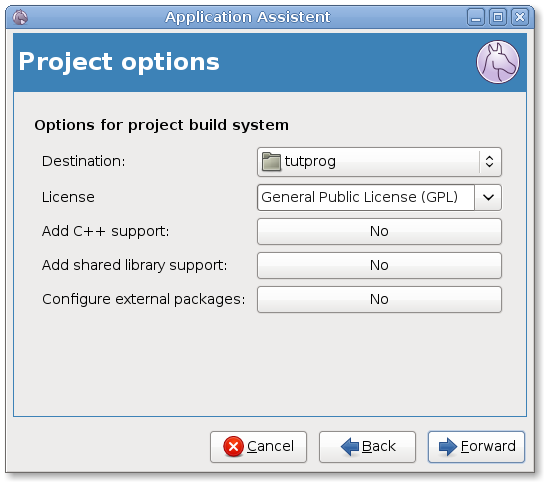
Click on Destination and create a new directory named tutprog for your new project. You need to avoid space in the directory name. Then, keep all other options to their default value to get a minimal project.
-
Click on .
Figure 3-5 Project summary page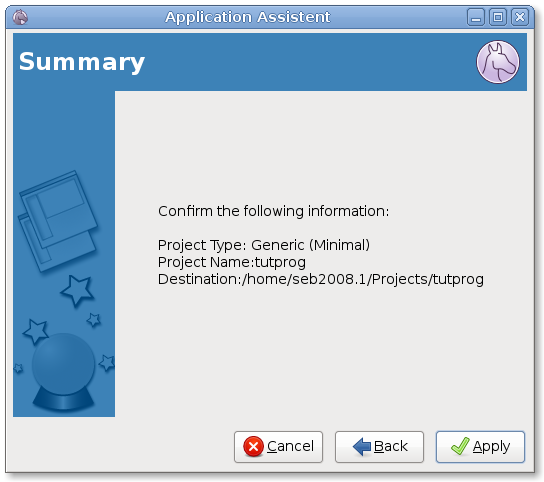
This is the final page of the assistant, check that everything is right.
-
Click on . Anjuta will create all needed files and directories, in the message window, you will see the following:
Figure 3-6 Project creation messages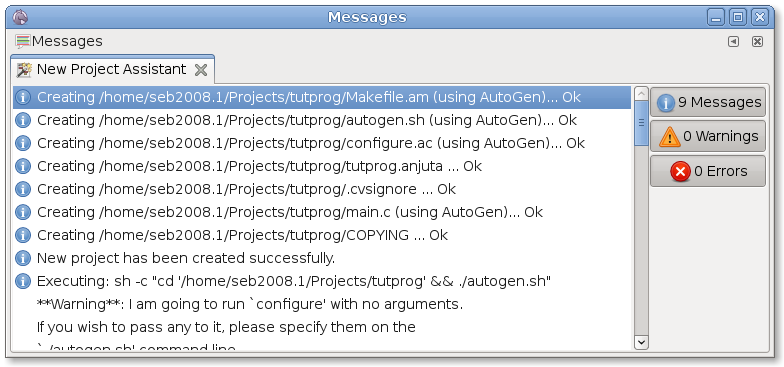
Then, autogen.sh is called and run the configure script. Finally Anjuta open the new project. You can directly build the project, as the main source contains a few lines of C and configure has been run.
3.2.2. Looking at configure.ac
dnl Process this file with autoconf to produce a configure script.
dnl Created by Anjuta application wizard.

AC_INIT(tutprog, 0.1)

AM_INIT_AUTOMAKE(AC_PACKAGE_NAME, AC_PACKAGE_VERSION)
AC_CONFIG_HEADERS([config.h])

AC_PROG_CC

AC_OUTPUT([
Makefile
])
It is still quite simple with a bit more macros. Let's look at all unknown ones:
- dnl
-
It is not a macros, just the marker to start a comment in M4, the language used to write configure.ac. It is like '#' is scripts or '//' in C++.
- AM_INIT_AUTOMAKE
-
The AC_INIT macro uses the new form with package and version but AM_INIT_AUTOMAKE keeps the old one. It is not needed anymore.
- AC_CONFIG_HEADERS
-
This tells Autoconf to pass all defines in a file named config.h instead of using several -Dxxxx flags on the command line (see Section 3.1.4 ― Build project). It is easier when there are lots of them. A file named config.h.in is created automatically from the configure.ac using autoheader. Then config.h is created automatically like makefiles by configure. So it is painless for the developer.
- AC_OUTPUT
-
This is the old form of the AC_OUTPUT, where you specify all output files instead of using AC_CONFIG_FILES.
3.2.3. Looking at Makefile.am
## Process this file with automake to produce Makefile.in
## Created by Anjuta

AM_CPPFLAGS = \
        -DPACKAGE_DATA_DIR=\""$(datadir)"\"

AM_CFLAGS =\
         -Wall\
         -g

bin_PROGRAMS = tutprog

tutprog_SOURCES = \
        main.c

tutprog_LDFLAGS =

tutprog_LDADD =
Not much things in the Makefile.am neither:
- AM_CPPFLAGS
-
It is used to give additional flags to the C preprocessor. Here it defines an additional PACKAGE_DATA_DIR constant set by configure
- AM_CFLAGS
-
It defines some additional flags for the C compiler: all warning and add debugging information that we have already seen at the beginning of this tutorial (see Section 2.1 ― Using GCC)
- tutprog_LDFLAGS
-
It adds a places where you can put additional linker options for the tutprog program.
- tutprog_LDADD
-
It adds a places where you can put additional libraries for the tutprog program.